Sunday, December 19, 2010

Ricotta Orange Pound Cake

This months issue of the Food Network Magazine, featured this recipe for Ricotta Orange Pound Cake as an idea for Holiday gift giving. I thought the recipe looked so good and that it would make a really nice teacher gift. It would be something that David would even be able to help make. So we headed to the Christmas Tree Shop and picked up some really cute holiday bread pans and the ingredients for the cake. Baking is NOT my thing so unfortunately the first try was a disaster. I tried again a few days later and came a lot closer. I was going to just go to my go to banana bread recipe (passed down from my Nana Scott) that I have been making for years, but the cake tasted so good, I just needed to tweak my execution! I gave it one last go tonight and third time was definitely a charm! David is very excited to be giving out this recipe to his teachers.

What You Need:
1 1/2 cups cake flour
2 1/2 teaspoons baking powder
1 teaspoon kosher salt
3/4 cup (1 1/2 sticks) butter, room temperature, plus more to grease the baking pan
1 1/2 cups whole milk ricotta cheese
1 1/2 cups sugar, plus 1 tablespoon
3 large eggs
1 teaspoon vanilla extract
1 orange, zested
2 tablespoons Amaretto
Powdered sugar, for dusting

The Steps:
Preheat the oven to 350 degrees F. Grease a 9 by 5 by 3-inch loaf pan with butter. In a medium bowl combine the flour, baking powder, and salt. Stir to combine.

Using an electric mixer, cream together the butter, ricotta, and sugar until light and fluffy, about 3 minutes. With the machine running, add the eggs 1 at a time. Add the vanilla, orange zest, and Amaretto until combined. Add the dry ingredients, a small amount at a time, until just incorporated. Pour the mixture into the prepared pan and bake until a toothpick comes out clean and the cake is beginning to pull away from the sides of the pan, about 45 to 50 minutes. Let the cake cool in the pan for 10 minutes then transfer to a wire rack to cool completely. Using a mesh sieve, dust the cooled cake with powdered sugar.

The Verdict:
Obviously with 1 1/2 sticks of butter, it's not exactly figure friendly, but it's so good it's worth it! I am so happy that I was finally able to figure it out. They will be given to David's teachers tomorrow. I wrapped each loaf in plastic wrap and then put it back into the pan.


I obviously omitted the powdered sugar, I thought it would be too messy since I needed to wrap them to keep them fresh.

Monday, November 22, 2010

Enchilada Suiza

It's no secret that the Doc and I love Mexican/Tex-Mex Food and since I had a vat of shredded Mexican blend cheese in my fridge that I wanted to use up, I decided to make enchiladas for dinner. I have never been a big fan, and would never order them in a restaurant, but the Doc is, and I like to be accommodating.

The last few times I made enchiladas, I have used a Tyler Florence recipe. They are so yummy, but I had made them recently and wanted to try something different. I went onto All Recipes and typed enchilada into the search field and then sorted by rating. It took me a few clicks before finding this recipe for Enchilada Suizas, a dish that doesn't use sour cream in the mix, otherwise the Doc won't touch it! I had never heard of this dish before but it sounded good, and it meets the NO sour cream requirement when cooking Mexican in this house!!

What You Need:
2 tablespoons butter
2/3 cup chopped Spanish onion
2 tablespoons all-purpose flour
1 1/2 cups chicken broth
1 cup chopped green chile peppers
1 clove garlic, minced
3/4 teaspoon salt
1 dash ground cumin

12 (8 inch) corn tortillas
canola oil for frying (I skipped this part!)
1 cup shredded Monterey Jack cheese
1 cup shredded mild Cheddar cheese
2 cups shredded, cooked chicken breast meat
1 cup heavy cream
1/4 cup chopped green onion
1/2 cup sliced green olives
1 pint cherry tomatoes

The Steps:
1. Prepare salsa verde: Melt butter in saucepan over medium heat. Saute the onion until soft. Stir in the flour. Add the broth, then add the chiles, garlic, salt, and cumin. Simmer about 15 minutes to blend flavors, then set aside. Preheat oven to 350 degrees F (175 degrees C.)

2. In a heavy skillet, lightly fry tortillas in shallow oil, being careful not to make them too crisp to roll. Combine the cheeses and keep 1/2 cup aside for topping. Dip each tortilla in salsa verde (both sides.) Place 2 heaping tablespoons chicken and about 2 tablespoons cheese down the center of each; roll and place seam side down in a shallow dish.

3. After all the rolled tortillas are in the dish, spoon additional salsa verde over them and then cover evenly with heavy cream. Sprinkle with remaining 1/2 cup cheese mixture, and with the green onions.

4. Bake uncovered in preheated oven for 20 minutes. Serve immediately, garnished with the olives, cherry tomatoes, and with additional salsa on the side.

The Verdict:
This was SO SO SO good! I probably went a little overboard on the cheese, or a LOT overboard if you ask the Doc, but it was still so yummy! I will definitely be making this one again.

I made a few changes to the original recipe. I did not fry my tortillas. I heated them per the package directions in the oven. I also used light cream instead of heavy cream and I only used a 1/2 cup because that is all I had on hand. The package of tortillas that I bought only came with 8 but that was plenty for us with some leftover.

I made my shredded chicken by filling a pot with 2.5 cups chicken broth, 4 cups of water and tossed in some paprika, chili powder, garlic powder, season salt, pepper, onion powder, and cumin. Boil the chicken until done and then shred with two forks.

Friday, November 5, 2010

Homemade Salad Dressings

Once a week at family dinner (in NH at my parents house with all the siblings, SO's and grandkids) I will make a salad. It started because I was trying to eat better myself and my brothers girlfriend doesn't eat meat. I have made a number of different salads but what has been more fun is making the dressings for these salads myself. I can control the ingredients, there are no preservatives and like I said, it's fun!

I have made a number of salads now but last nights salad is my favorite to date! I combined baby romaine greens with some Roma grape tomatoes (quartered), shredded carrots, Spanish olives (sliced), homemade bacon bits and some goat cheese. I served it with some pan seared shrimp that I seasoned with some season salt, pepper and a dash of old bay. I cooked it in the same pan as the bacon leaving a bit of the grease and adding a splash of white wine to the pan. It was so good, but it was the dressing that made it one of the best salads I have made!!


Homemade Creamy Italian Dressing

Ingredients:
1 cup mayonnaise (I used canola mayonnaise to keep the fat content down but still taste full fat)
1/2 small onion
2 tablespoons red wine vinegar (I used white wine vinegar because that is all I had)
1 tablespoon white sugar
3/4 teaspoon Italian seasoning
1/4 teaspoon garlic powder
1/4 teaspoon salt
1/8 teaspoon ground black pepper

Directions:
In a blender or food processor, combine mayonnaise, onion, vinegar, and sugar. Season with Italian seasoning, garlic powder, salt, and pepper. Blend until smooth.

Another favorite salad I have been making is a basic Greek salad using romaine lettuce, feta cheese, grape tomatoes (cut in half if fairly large), and chopped kalamata olives. If you click on the link below, the original recipe was set for 120 servings so I adjusted it to 10!

Greek/House Dressing

Ingredients:
1/2 cup olive oil
1-1/4 teaspoons garlic powder
1-1/4 teaspoons dried oregano
1-1/4 teaspoons dried basil
1 teaspoon pepper
1 teaspoon salt
1 teaspoon onion powder
1 teaspoon Dijon-style mustard
2/3 cup red wine vinegar

Directions:
In a medium sized bowl, mix together the olive oil, garlic powder, oregano, basil, pepper, salt, onion powder, and Dijon-style mustard. Pour in the vinegar, and mix vigorously until well blended. Store tightly covered at room temperature.

The second time I made this, I used my food processor for this one too, if you have one I would recommend using it.

Since family dinners are normally on Wednesdays and since Wednesday is Prince ® spaghetti day, family dinner is some type of pasta dinner! When making a yummy red sauce I liked serving it with a Caeser salad made with romaine lettuce, shredded Parmesan cheese and garlic croutons. This is another salad where the dressing makes all the difference! Someday when I have more time I will try out this links homemade croutons too! If you can tolerate anchovies, this dressing is SO good!

Caesar Salad Supreme

3 cloves garlic, peeled
3/4 cup mayonnaise (again I used the canola mayonnaise)
5 anchovy fillets, minced
2 tablespoons grated Parmesan cheese, divided
1 teaspoon Worcestershire sauce
1 teaspoon Dijon mustard
1 tablespoon lemon juice
salt to taste
ground black pepper to taste

Directions:
Mince 3 cloves of garlic, and combine in a small bowl with mayonnaise, anchovies, 2 tablespoons of the Parmesan cheese, Worcestershire sauce, mustard, and lemon juice. Season to taste with salt and black pepper. Refrigerate until ready to use.

And last, on a non-pasta night, I did homemade Chinese food. So the salad was made using baby spinach, homemade bacon bits, chopped pear and some glazed pecans. I made a Ginger dressing to serve with it, it was really strong but pretty tasty. This one is definitely my least favorite but it was still really good.

Asian Ginger Dressing

Ingredients:
3 cloves garlic, minced
2 tablespoons minced fresh ginger root
3/4 cup olive oil (many of the reviews say to do half sesame oil, I may try that next time)
1/3 cup rice vinegar
1/2 cup soy sauce (also the reviews say to cut this in half, but I don't think it was too strong, probably just a personal preference)
3 tablespoons honey
1/4 cup water

Directions:
In a 1 pint glass jar or larger, combine the garlic, ginger, olive oil, rice vinegar, soy sauce, honey, and water. Cover the jar with a tight fitting lid, and shake well. Remove lid, and heat jar in the microwave for 1 minute just to dissolve the honey. Let cool, and shake well before serving. Store covered in the refrigerator.

So there you are, four of my new favorite salad dressings. Next time you're in the mood for a salad, try one of these homemade dressings. So much better than anything you can buy in a bottle!

Saturday, September 4, 2010

Chicken Marsala

I made this recipe for Chicken Marsala the other night for dinner when my cousin came over. I was trying to think of something I could make with chicken since it she was coming over for dinner the night before my weigh-in. I sent her a text asking her if she liked mushrooms, because well, if you don't like mushrooms then a dish like Chicken Marsala might not be for you! Obviously she said yes!

What You Need:
1/4 cup all-purpose flour for coating
1/2 teaspoon salt
1/4 teaspoon ground black pepper
1/2 teaspoon dried oregano
4 skinless, boneless chicken breast halves - pounded 1/4 inch thick
4 tablespoons butter
4 tablespoons olive oil
1 cup sliced mushrooms
1/2 cup Marsala wine
1/4 cup cooking sherry

The Steps:
1.In a shallow dish or bowl, mix together the flour, salt, pepper and oregano. Coat chicken pieces in flour mixture.
2.In a large skillet, melt butter in oil over medium heat. Place chicken in the pan, and lightly brown. Turn over chicken pieces, and add mushrooms. Pour in wine and sherry. Cover skillet; simmer chicken 10 minutes, turning once, until no longer pink and juices run clear.

The Verdict:
YUM! A huge hit all around! This was delicious and so incredibly fast and easy to make. I served it with linguine, cooked just under al dente and then I transferred the linguine into the skillet that the chicken and mushrooms were in so the pasta could soak up the sauce. I actually regretted making this on the night before a weigh-in because it was so hard not to grab seconds! I am one of those "don't like mushroom" people and I still LOVED it, for me my dislike of mushrooms is a texture thing so it's no big deal for me to pick them out, which is EXACTLY what I did. Now if you're like my friend Ben you won't go near this dish with a 10 foot pole!

I cannot wait to make this one again. Especially since it was pretty much one of the easiest dishes that tasted gourmet I have made in a long time! Oh and to add the veggie factor, I roasted some fresh green beans in the oven, sprinkled with a little kosher salt and drizzled in olive oil (bake at 400 for about 10 minutes!).

Friday, August 27, 2010

Pioneer Woman's Pasta Primavera

I have never been big on veggie dishes. What can I say, I like meat! But since starting Biggest Loser I have had to incorporate more veggies into my diet. It isn't easy trying to find recipes that are both healthy AND tasty! So I was happy to find this Pasta Primavera recipe on one of my favorite recipe sites! Click on the link to see step by step pictures...I didn't take any of my own this time.

What You Need:
1 cup Bite-sized Broccoli Pieces (up to 1 1/2 Cups)
½ whole Onion Diced Finely
3 cloves To 4 Cloves Garlic, Chopped Finely
2 whole Medium To Large Carrots, Sliced On The Bias (diagonally)
2 whole Medium Zucchini, Sliced On The Bias (diagonally)
1 whole Medium Yellow Squash (optional)
1 container (about 5 Oz.) White Button Or Baby Porcini Mushrooms, Roughly Sliced
1 whole Red Bell Pepper, Sliced Into Strips
4 Tablespoons Butter
2 Tablespoons Olive Oil
1 pound Pasta (She used Penne, I used Faralle)

FOR THE SAUCE:
¼ cups Dry White Wine (up To 1/2 Cup), Optional (replace with additional broth if not using)
½ cups Low Sodium Chicken Broth
1 cup Whipping (heavy) Cream
1 cup Half-and-half
½ cups Grated Parmesan Cheese
5 leaves Basil (or More To Taste), Plus Extra For Garnish
½ cups Frozen Peas

The Steps:
First, prep the vegetables. Chop the broccoli into bite-sized pieces, about 1 to 1 ½ cups worth. Dice half a yellow onion. Chop 3 to 4 cloves of garlic. Slice carrots on the bias (diagonally), and do the same for the zucchini and yellow squash. Roughly slice the mushrooms and slice the red pepper (seeded) into strips.

Heat 2 tablespoons butter with 2 tablespoons olive oil in a skillet over medium-high heat. Add the chopped onion and garlic together and cook for a minute or two, until they start to turn translucent. Then throw in the broccoli. Stir, and add in the carrots.

Stir it around, cooking it for only a minute, tops. Transfer the mixture to a plate. Add in the red pepper strips to the skillet. Stir them around for a minute or so, then transfer them to the plate.

Add pasta to slightly salted boiling water and cook to al dente.

Add a tablespoon of butter to the skillet. Add squash and zucchini, cook for less than a minute, then transfer to plate. Cook mushrooms for a minute or two (add salt to taste), and again transfer to the plate.

FOR THE SAUCE
To make the sauce, pour ¼ to ½ cup dry white wine into the skillet (see note below). Add ½ cup low-sodium chicken broth, a tablespoon of butter and scrape the bottom of the skillet to pull up the flavor left behind by the veggie cooking. Cook for 1 to 2 minutes until the liquid starts to thicken.

Add 1 cup whipping cream and 1 cup half-and-half. Measure out ½ cup grated Parmesan; add to the skillet. Add salt and pepper to taste. Chiffonade 5 to 6 fresh basil leaves and add that to the sauce; stir.

Dump veggies and mushrooms into the sauce along with ½ cup frozen peas right out of the freezer. Add pasta al dente and stir. If the sauce seems a little thick, or if there doesn’t seem to be enough sauce, add a good splash of chicken broth and a little more half-and-half. Top with more Parmesan, salt, pepper, and basil to taste.

Note: if you’re averse to wine, add chicken broth instead. But watch the salt later.

The Verdict:
For a dish with no meat, this was surprisingly very filling, but more importantly very tasty! I made some healthier substitutions to the sauce by skipping the whipping cream and using whole milk instead, along with the half and half. The Doc was a BIG fan and even the boys enjoyed it. This is going to have to be a regular dish in our rotation!

Monday, August 16, 2010

P.F. Chang's Mongolian Beef & Garlic Noodles

As a gift, from my friend Susan, I received a cookbook called America's Most Wanted Recipes: Delicious Recipes from Your Family's Favorite Restaurants. There were some really cook dishes in the book and I tried the Applebee's Crispy Orange Chicken Skillet. It was a huge hit, though not exactly figure friendly. I was out shopping last week and saw a copy of the second edition, More of America's Most Wanted Recipes: More Than 200 Simple and Delicious Secret Restaurant Recipes--All for $10 or Less! and bought it because it had a copycat recipe for one of our favorite dishes at the Cheesecake Factory, which was delicious, by the way! Tonight I decided to try the P.F. Chang's Mongolian Beef and serve it with the recipe for Garlic Noodles. While I have eaten at P.F. Chang's before, I have never had either dish so I wasn't sure what to expect, but everything turned out delicious.

Mongolian BeefBold

What You Need:
For the Sauce:
2 tsp vegetable oil
1/2 tsp minced peeled fresh ginger
1 Tb chopped garlic
3/4 cup packed dark brown sugar
1/2 cup soy sauce

1 pound flank steak
1/4 cup cornstarch
1 cup vegetable oil
2 green onions sliced

The Steps:
1. To make the sauce, heat the 2 teaspoons vegetable oil in a medium saucepan and saute the ginger and garlic, stirring continuously. Do not let the garlic burn. Add the brown sugar, soy sauce, and 1/2 cup of water. Dissolve the brown sugar by whisking vigorously. Bring the mixture to a boil and let the sauce thicken, then set it aside until read to use.

2. Slice the flank steak into 1/4-inch-thick pieces. Be sure to cut against the grain of the meat so that it remains tender. Coat each piece lightly in the cornstarch and refrigerate for 10 minutes.

3. Heat the oil in a wok or large skillet. Add the beef, working in batches, and fry until each piece is slightly golden brown. Remove to a paper towel and drain. Discard the oil.

4. Heat the wok over medium heat and return the meat to stir-fry for 1 minute. Add the sauce and simmer for 1 minute, then add the green onions. Stir fry for another minute, then transfer to a serving platter.


Garlic Noodles

What you Need:
Cantonese Stir-Fry Sauce
1/4 cup water
1 Tb chicken bouillon powder
1 Tb sugar
1 Tb Shao Hsing (or dry vermouth or the book recommends a medium dry Sherry)
1 Tb oyster sauce
1/2 tsp salt
1 tsp cornstarch

Noodles
1 Tb minced garlic
2 Tb chopped chile pepper
2 Tb canola oil
1 Tb sugar
2 Tb white vinegar
1 lb fresh Chinese noodles or vermicelli (cooked according to package directions)
1/2 tsp red pepper flakes
2 Tb chopped fresh cilantro
1/2 tsp Asian sesame oil

The Steps:
1. Make the Cantonese sauce by combining all the sauce ingredients in a small bowl and whisking to blend well. Set aside.

2. Heat a wok or skillet and stir-fry the garlic and chile pepper in the canola oil, about 1 minute. do not let the garlic burn.

Add the sugar and vinegar and stir to blend. Add the cooked noodles with the red pepper flakes and cilantro, then add 1/2 cup of the Cantonese sauce.

Drizzle the sesame oil over everything in the wok and stir to mix, allowing the sauce to thicken.

The Verdict:
Not exactly the healthy dinner I should have made, but it was so very yummy! I was bad and even got seconds it was so good.


Next time I make this, I will use vermicelli or a thinner Chinese noodle. The noodles above are wide Chinese Lo Mien noodles and they worked but I prefer a thinner noodle. I also missed the part about adding a 1/2 cup of water to the Mongolian stir-fry sauce. So perhaps our sauce was more concentrated? I don't know or care for that matter because it didn't affect the taste, and that is really all that matters!

If you wanted to make this dish healthier, you could always grill the flank steak first, then slice it and stir-fry it. It wouldn't be as bad as frying the stead with the cornstarch. The downside is that you wouldn't get the same texture on the meat. Another way to save calories would be to serve it with brown rice, which was my intention, until I saw the recipe for the garlic noodles.

The best part is that this is super easy and fast to make. The sauces can be made ahead of time and refrigerated too. I really don't think this one will disappoint!

Thursday, August 12, 2010

Homemade Granola Bars

A while back my friend Susan had mentioned that she had a recipe for homemade granola bars. Since I am not much of a baker, I never thought it would be something I would ever want to make, and so I never bothered to get the recipe. I had forgotten all about it until recently, when I was talking to her about the changes I wanted to make in our diets, and how I was looking at more ways to cut out processed foods. She mentioned the recipe again and the next time I brought the boys over to play she had made a batch! They were delicious. I told her that she needed to send me the recipe so that I could try them out myself.

What You Need:

2 cups rolled oats
3/4 cup packed brown sugar
1/2 cup wheat germ
3/4 teaspoon ground cinnamon
1 cup all-purpose flour
3/4 cup raisins (optional)
3/4 teaspoon salt
1/2 cup honey
1 egg, beaten
1/2 cup vegetable oil
2 teaspoons vanilla extract

The Steps:
1. Preheat the oven to 350 degrees F (175 degrees C). Generously grease a 9x13 inch baking pan.

2. In a large bowl, mix together the oats, brown sugar, wheat germ, cinnamon, flour, raisins and salt.


Make a well in the center, and pour in the honey, egg, oil and vanilla.


Mix well using your hands. Pat the mixture evenly into the prepared pan.


3. Bake for 30 to 35 minutes in the preheated oven, until the bars begin to turn golden at the edges. Cool for 5 minutes, then cut into bars while still warm. Do not allow the bars to cool completely before cutting, or they will be too hard to cut.

The Verdict:
AMAZING! Really, they are so good. Per Susan's recommendations, I followed the tips in the first set of comments:

This recipe is really great, but I have some changes that can make it near perfect. I used whole wheat flour instead of all-purpose flour, canola oil in place of vegetable oil, and I reduce the brown sugar to 1/2 cup and they are still super sweet, and even down to 1/3 cup and they're still yummy. For flavor I always use 1 tsp. of cinnamon and a whole cup of raisins. To make them chewy still use a 9x13 pan but don't spread the mixture into the entire pan- leave about an inch and a half empty space on one end. (The batter will cook exactly as it sits so you don't have to worry about it spreading. Also, you must be careful not to overcook these. Thirty minutes is way too long, but since every oven is different I can only really tell you that you need to take them out right when you see the edges becoming brown (the middle may still appear undone.) For me that is 18 minutes. If you do that they will stay chewy forever--just store them in a ziploc bag. And my last bit of advice is that you can get really creative with this recipe. For example, instead of raisins add dried cranberries and slivered almonds. Or up the cinnamon and add chopped dried apples. Or you could add peanut butter and freeze dried banana bits (like you find in the toddler section). Or you could play around with some canned pumpkin and pumpkin pie spice. Just have fun!

I used the 1/3 cup of sugar, whole wheat flour, canola oil (with 1 tablespoon of Flax Oil added in), and the full tsp of cinnamon. I also substituted the raisins for chocolate chips. The first time I made them I also added some dried cranberries. Next time I am thinking about trying the peanut butter. They really are versatile and the best part is that since they are homemade, you control the ingredients.


As you can see from the picture above, I overcooked them the first time. The second time I took them out of my oven after 20 minutes and they were PERFECT! The boys can't get enough of them! Even the Doc is a fan!

Ready for the taste test!


All gone!

Saturday, July 31, 2010

Eggplant Parmesean

As you saw in the previous post, I started growing my own basil (OK, I meant the boys). I had so much I thought I would try making my own pesto. I googled it and found this recipe from Tyler Florence. It was from his show How to Boil Water and the episode was called Veggie Delight. Often times I will click on the link to see what else was made during that shows episode. That is when I saw his recipe for Eggplant Parmesan. Eggplant has always been one of the veggies that scared me. I was never a fan of the texture or taste but, I never ate peppers or onions before and now I don't mind them in my food, so I decided to give Eggplant a second chance.

Eggplant Parmesan

What You Need:
1/3 cup extra-virgin olive oil
3 garlic cloves, minced
1 cup black olives, pitted and roughly chopped
1 teaspoon hot red pepper flakes
3 tablespoons capers, drained
2 (28-ounce) cans tomatoes (recommended: San Marzano), crushed by hand
1/4 cup fresh basil leaves, hand torn
Kosher salt and freshly ground black pepper
4 cups dried bread crumbs
1 tablespoon garlic powder 1 tablespoon dried oregano
Salt and freshly ground black pepper
5 eggs
1 cup all-purpose flour
Extra-virgin olive oil
4 pounds medium eggplants, trimmed and cut lengthwise into 1/2-inch-thick slices
2 pounds whole milk ricotta cheese
1/2 cup chopped fresh basil leaves
1 1/4 cups freshly grated Parmigiano-Romano
2 pounds shredded mozzarella cheese

The Steps:
First make the sauce: Put a large saucepan over medium heat and add the olive oil. Add the garlic and cook 1 minute. Add the olives, red pepper flakes, and capers, and let that cook for 2 minutes, stirring often. Toss in the tomatoes with their juices and bring to a low simmer. Stir in the basil and season with salt and pepper. Simmer for 10 minutes. Remove from the heat and set aside.


Combine the bread crumbs, garlic powder, and oregano in a shallow bowl; season generously with salt and pepper and mix well. Crack 3 of the eggs into another shallow bowl; season with salt and pepper and beat with a fork to mix. Put the flour in another shallow bowl and season with salt and pepper. Arrange the eggplant, flour, beaten eggs, and bread crumbs on a work surface near the stove.


Heat about 1/4-inch olive oil in a large skillet over medium heat. When the oil is hot, dredge several eggplant slices first in the flour, then dip them in the egg, and finally coat them in the bread crumbs. Put as many eggplant in the skillet as will fit comfortably in a single layer and cook until tender and well browned on both sides. Drain on paper towels. Cook all of the eggplant slices this way, adding more olive oil to the pan as needed.


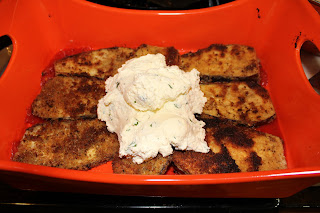
Stir together the ricotta and 1/2 cup of the Parmigiano cheese. Stir in the basil and remaining 2 eggs, and season with salt and pepper.

Preheat the oven to 350 degrees F.

To assemble the dish, first get yourself set up with a large, buttered baking dish. Have ready the eggplant, the ricotta mixture, the tomato sauce, the shredded mozzarella cheese and the remaining 3/4 cup grated Parmigiano. To start, spoon some of the tomato sauce over the bottom of the baking dish. Now add a layer of eggplant. Spread with half of the ricotta mixture.


Spoon another layer of tomato sauce over and sprinkle with about one-third of the mozzarella. Repeat with a layer of eggplant, the rest of the ricotta, tomato sauce, and another third of the mozzarella. Finish with the rest of the eggplant, the rest of the tomato sauce, and the rest of the mozzarella. Sprinkle with the 3/4 cup Parmigiano.

Put the dish in the oven and bake for about 1 hour, until golden and bubbling. Let stand for about 20 minutes before cutting.

The Verdict:
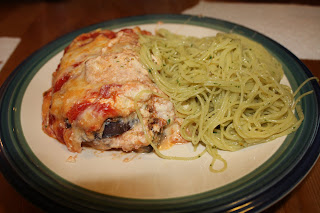
I actually thought it was pretty good, the Doc, not so much. He wasn't a fan of eggplant before either, but this didn't change his mind. David tried it, but I am not sure he loved it, however, Shaun couldn't get enough. I am wondering if he just liked the cheesey goodness surrounding the fried eggplant.


For this dish, I made my own bread crumbs by throwing some slices of stale whole wheat bread into my food processor (OMG, I love that thing!). In my mind, using whole wheat bread to make the crumbs made "healthier". Ha! I also did use lower fat mozzarella cheese, however I did use full fat ricotta. I don't see why you would need to use the full fat, though I definitely would NOT use fat free because I do notice a difference.


I got some feedback from some friends, who are experts on the dish, and I was advised for next time to cut it in circles and skin it. I also didn't cut it as thin as I would have liked. I think this is definitely worth trying out again, because the boys seemed to like it enough and I would like to see how different it turns out making those adjustments. I'll just have to make some chicken for the Doc! I would also need to make sure I gave myself more time to prepare so we're not eating dinner at 7:30 again. This dish is more of a weekend dinner, as opposed to a weeknight dinner.

Tuesday, July 27, 2010

Fresh Basil

I have started an herb garden! Well OK, I didn't start an herb garden, the boys started an herb garden with Daddy's help! The last two times I tried turned into a big FAIL! I bought one of those potted basil plants from the supermarket and the boys re-potted it in the window box I picked up at target. It is my opinion, that basil MUST be fresh, ALWAYS! The problem is that it's expensive to buy at the supermarket and you never use all of it before it goes bad. So the best way to prevent that is to grow your own. Along with the basil, they also planted some oregano and cilantro seeds. At first I didn't think it was going to make it, but it persevered through the nasty triple H weather and within a week my basil had doubled in size and the oregano and cilantro budded.

Our City Back Yard Herb Garden


Since I had so much basil, I decided to make some pesto for dinner! While browsing pasta dishes I also came across a recipe for Eggplant Parmesan. I have never made it before, but decided to give it a shot, since it fits into my goal of adding more veggies into our diets! I will post the recipe I used, along with pictures tomorrow! For now, it's late and time for this tired Momma to hit the sack!

Thursday, July 22, 2010

My New Food Journey!

Five weeks ago I made a decision to get back on track. I had plateaued with my post-pregnancy weight loss and I was feeling really down about it. It was time to stop making excuses and just start cooking again. I have been in a big time rut, but I am excited to start cooking again and making healthy meals for me and the boys! I am looking at food in a whole new way now and my goal is to cut out as much processed food as possible, and start making better choices about the food we eat. By doing this, I feel like I don't have to be on a "diet". Everything in moderation!

For tonights dinner, I made Flank Steak Salad with Plums and Blue Cheese that I saw in the August 2010 edition of Cooking Light Magazine that I picked up at the supermarket the other night. Salads are becoming a go to dinner when I don't feel like cooking. This one is very simple but very flavorful!

What You Need:
1/2 teaspoon freshly ground black pepper
1/4 teaspoon salt
1 1/2 tablespoons olive oil, divided
4 teaspoons fresh lemon juice, divided
1lb flank steak, trimmed
Cooking spray
1 teaspoon honey
1/8 teaspoon salt
8 cups loosely packed baby arugula
3 plums, thinly sliced
1/4 cup crumbled blue cheese

The Steps:
1. Combine pepper, 1/4 teaspoon salt, 1 1/2 teaspoons olive oil, and 1 teaspoon lemon juice in a small bowl; rub over both sides of steak.

2. Heat a large skillet over medium-high heat. Coat pan with cooking spray. Add steak to pan; cook 5 minutes on each side or until desired degree of doneness. Remove steak from pan; let rest 5 minutes. Cut steak diagonally across grain into thin slices.

3. Combine remaining 1 tablespoon olive oil, 1 tablespoon lemon juice, honey, and 1/8 teaspoon salt in a large bowl; stir well with a whisk. Add arugula; toss gently to coat. Arrange about 1 1/2 cups arugula mixture onto each of 4 plates; top each serving with 3 ounces steak, about 1/2 cup plums, and 1 tablespoon cheese.


The Verdict:
This was really, really good! I have never been a fan of arugula before, heck I have never really been into "Rabbit Food" (as my brother Dave calls it) before. To be perfectly honest, I turned my nose up at it before really giving it a fair chance. It wasn't half bad though! It definitely has more bite to it than a spinach salad would but I'll use it again.

The dressing was excellent! Very light and had a hint of sweetness form the honey. I loved that it had a "from scratch" dressing because it fits into my goal of cutting out processed foods. By making the dressing myself, as opposed to buying it from the store, I know what is in the dressing there are no fillers or preservatives!

I ended up using thinly sliced sirloin steak because the supermarket was out of flank steak. We also grilled it because, it's summer and that is what you do with meat in the summer! The Doc is the GrillMaster of the house and the steaks were perfectly grilled!

All around a fabulous dinner and when you eat a dinner like that you have saved yourself some room for some ICE CREAM!

Monday, June 28, 2010

Chocolate Covered Bacon

Get yourself some thick cut bacon. Place slices ona cookie sheet and bake in the over at 375 degrees for about 20 minutes (remove them just before they reach the crumbly stage).

While the slices are still warm, dip them in melted milk chocolate. For an added bonus, top with drizzled white chocloate and chopped hazelnuts.

Mmmmmmmmmmmm......chocolate and bacon.............

Thursday, June 17, 2010

Turkey Lasagna

I was looking for a new lasagna recipe and came across this one for Turkey Lasagna the Food Networks website. There were 308 reviews and it had a five star rating so I figured it had to be a good one. I also liked the idea of using turkey sausage and a ricotta mixture that had goat cheese mixed in sounded interesting.

What You Need:
2 tablespoons olive oil
1 cup chopped yellow onion (1 onion)
2 garlic cloves, minced
1 1/2 pounds sweet Italian turkey sausage, casings removed
1 (28-ounce) can crushed tomatoes in tomato puree
1 (6-ounce) can tomato paste
1/4 cup chopped fresh flat-leaf parsley, divided
1/2 cup chopped fresh basil leaves
2 teaspoons kosher salt
3/4 teaspoon freshly ground black pepper
1/2 pound lasagna noodles
15 ounces ricotta cheese
3 to 4 ounces creamy goat cheese, crumbled
1 cup grated Parmesan, plus 1/4 cup for sprinkling
1 extra-large egg, lightly beaten
1 pound fresh mozzarella, thinly sliced

The Steps:
Preheat the oven to 400 degrees F.

Heat the olive oil in a large (10 to 12-inch) skillet. Add the onion and cook for 5 minutes over medium-low heat, until translucent. Add the garlic and cook for 1 more minute. Add the sausage and cook over medium-low heat, breaking it up with a fork, for 8 to 10 minutes, or until no longer pink.


Add the tomatoes, tomato paste, 2 tablespoons of the parsley, the basil, 1 1/2 teaspoons of the salt, and 1/2 teaspoon pepper. Simmer, uncovered, over medium-low heat, for 15 to 20 minutes, until thickened.


Meanwhile, fill a large bowl with the hottest tap water. Add the noodles and allow them to sit in the water for 20 minutes. Drain.

In a medium bowl, combine the ricotta, goat cheese, 1 cup of Parmesan, the egg, the remaining 2 tablespoons of parsley, remaining 1/2 teaspoon salt, and 1/4 teaspoon pepper. Set aside.

Ladle 1/3 of the sauce into a 9 by 12 by 2-inch rectangular baking dish, spreading the sauce over the bottom of the dish. Then add the layers as follows: half the pasta, half the mozzarella, half the ricotta, and one 1/3 of the sauce. Add the rest of the pasta, mozzarella, ricotta, and finally, sauce. Sprinkle with 1/4 cup of Parmesan. Bake for 30 minutes, until the sauce is bubbling.


The Verdict:
I thought this was really great! The sauce was amazing and the addition of the goat cheese made the ricotta mixture nice and creamy! The Doc isn't much of a lasagna fan but even he liked it. I made this as a double batch and ended up accidentally getting one package of hot turkey sausage and one sweet. I liked the combination, gave the dish some touch of heat. If your looking for a different take on lasagna, then check this one out!

Friday, June 4, 2010

The Perfect Baked Potato!

For the past few weeks David has been able to participate in a cooking class at our local recreation center. At the last class they made these super cute "Mr. Potato Heads"


It gave me the idea for tonights dinner, baked potatoes with broccoli and cheese. I never had luck with making a baked potato before, I usually end up under cooking them. I decided to google baked potato to see what I could find on timing and came found a link to the Alton Brown's recipe for baked potatoes. I decided to pair it up with the creamy cheese sauce from the Pioneer Woman's macaroni and cheese. Add some steamed broccoli and voilà!

How to Bake the Potato:

What You Need:
Russet Potatoes
Canola Oil
Kosher Salt

The Steps:
1. Heat oven to 350 degrees and position racks in top and bottom thirds.
2. Wash potato (or potatoes) thoroughly with a stiff brush and cold running water. Dry, then using a standard fork poke 8 to 12 deep holes all over the spud so that moisture can escape during cooking.
3. Place in a bowl and coat lightly with oil.
4. Sprinkle with kosher salt and place potato directly on rack in middle of oven.
5. Place a baking sheet on the lower rack to catch any drippings.
6. Bake 1 hour or until skin feels crisp but flesh beneath feels soft.
7. Serve by creating a dotted line from end to end with your fork, then crack the spud open by squeezing the ends towards one another. It will pop right open. But watch out, there will be some steam.

NOTE: If you're cooking more than 4 potatoes, you'll need to extend the cooking time by up to 15 minutes.

How to Make the Cheese Sauce:

What You Need:
1 whole Egg Beaten
¼ cups (1/2 Stick Or 4 Tablespoons) Butter
¼ cups All-purpose Flour
2-½ cups Whole Milk
2 teaspoons (heaping) Dry Mustard, More If Desired
1 pound Cheese, Grated
½ teaspoons Salt, More To Taste
½ teaspoons Seasoned Salt, More To Taste
½ teaspoons Ground Black Pepper

The Steps:
1. In a small bowl, beat egg.
2. In a large pot, melt butter and sprinkle in flour. Whisk together over medium-low heat. Cook mixture for five minutes, whisking constantly. Don’t let it burn.
3. Pour in milk, add mustard, and whisk until smooth. Cook for five minutes until very thick. Reduce heat to low.
4. Take 1/4 cup of the sauce and slowly pour it into beaten egg, whisking constantly to avoid cooking eggs. Whisk together till smooth.
5. Pour egg mixture into sauce, whisking constantly. Stir until smooth.
6. Add in cheese and stir to melt.
7. Add salt and pepper. Taste sauce and add more salt and seasoned salt as needed! DO NOT UNDERSALT.

The Verdict:
Success! Seriously, it was the BEST baked potato I have ever had. They were cooked to perfection! I never knew how restaurants got the potato to open like a pocket and now I do! I really liked the how well the cheese sauce worked on the potato, rather than just melting some shredded cheese. By the way, these would be delicious with some butter, sour cream and chives too, or substituting the broccoli for bacon!!! YUM!

Tuesday, March 23, 2010

Spring Shells & Cheese

I am always excited when I get my Food Network Magazine in the mail. As I saw the Spring Shells and Cheese in the picture I couldn't wait to try it. Just be aware that this is no 30 minute meal, it's under their section for Weekend Meals.

Ingredients:
2 pounds medium zucchini
Kosher salt
1 stick unsalted butter
1/4 cup all-purpose flour
1/2 teaspoon freshly grated nutmeg
Pinch of cayenne pepper
Freshly ground black pepper
6 cups whole milk
4 sprigs fresh thyme
3 bay leaves
Grated zest of 1/2 lemon
1 pound medium pasta shells
4 shallots, minced
2 large egg yolks, lightly beaten
4 ounces parmesan cheese, grated (about 1 cup)
4 ounces gruyere cheese, grated (about 1 1/4 cups)
4 ounces baby spinach

Directions:
Grate the zucchini into a colander using the large holes of a box grater. Toss with 1 tablespoon salt, then place in the sink to drain, about 15 minutes. Squeeze out the excess liquid.


Meanwhile, melt 4 tablespoons butter in a large saucepan over medium heat. Add the flour, nutmeg, cayenne, 2 teaspoons salt, and black pepper to taste and mix with a wooden spoon to make a paste. Cook, stirring, until the paste puffs slightly, about 3 minutes.


Slowly whisk in the milk, then add the thyme, bay leaves and lemon zest and bring to a boil, stirring. Reduce the heat and simmer until thickened slightly, about 25 minutes. Strain into a bowl; discard the herbs.


Meanwhile, position a rack in the upper third of the oven and preheat to 425 degrees F. Bring a large pot of salted water to a boil; add the pasta and cook until al dente, about 8 minutes. Drain and add to the sauce.

Melt the remaining 4 tablespoons butter in a skillet over medium heat. Add the shallots and cook until translucent, 2 to 3 minutes. Add the zucchini and cook, stirring, until almost tender, about 4 minutes. Add the zucchini mixture to the pasta along with the egg yolks and all but 3 tablespoons of both cheeses; stir to combine, then add the spinach.


Transfer the mixture to a 9-by-13-inch baking dish and sprinkle with the reserved cheeses. Bake until browned on top and heated through, 25 to 30 minutes. Let rest 10 minutes before serving.


The Verdict:
This was a big hit. I had my cousin over for dinner and she really liked it and even took some leftovers for her lunch. The total preparation and cook time was about an hour and a half. The sauce takes about a half hour to simmer and then you need about a half hour to bake the dish once it's prepared. I would not make this dish again during the week but since the Doc home on vacation, I was able to give my undivided attention to the kitchen!

I really thought the flavor was excellent and the boys had no idea they were eating zucchini! Next time I might even add some cooked chicken to the bake.

Thursday, March 11, 2010

Eggs Florentine Get Wacky with Waffles

Eggs Florentine Get Wacky with Waffles is Rachael Ray's title, not mine! But this is something I have made a couple times now that and I wanted to share because it is really good, fast and the kids like it! This dish comes from her Yum-o cookbook.

Ingredients:
2 tablespoon extra virgin olive oil (EVOO), divided
2 tablespoons butter, divided
1/2 small onion, chopped
Salt and freshly ground black pepper
1 box frozen chopped spinach (10 ounces), defrosted and excess water squeezed out
A little freshly grated nutmeg
1 tablespoon flour
1/2 cup milk
1/2 cup chicken stock
4 frozen whole grain frozen waffles
4 slices Canadian bacon
8 eggs, beaten
A couple dashes of hot sauce (optional)
1 vine-ripe tomato, sliced into 4 pieces
1 cup grated Gruyère or Swiss cheese

The How To:
Pre-heat broiler to high. Set rack on second slotting from the top.

Place a medium size skillet over medium-high heat with one turn of the pan of EVOO, about one tablespoon, and one tablespoon of butter.

Once the butter has melted, add the onion and garlic and season with a little salt and pepper. Cook, stirring every now and then, for 2-3 minutes or until the onion starts to get tender. Add the spinach, season with a little nutmeg and stir to combine.


Sprinkle the spinach with the flour, stir to combine and cook for one minute. Add the milk and chicken stock and bring up to a bubble and simmer until thick, about 3-4 minutes. Turn off and cover to keep warm.


While the spinach is thickening, toast up your frozen waffles.

Place a second large nonstick skillet over medium-high heat with one turn of the pan of EVOO, about one tablespoon. Add the sliced Canadian bacon and cook on each side for 1-2 minutes until lightly browned, then remove and cover to keep warm. Return the skillet to medium-low heat and add the remaining tablespoon butter.

While the butter melts, beat the eggs with a splash of water, some salt, pepper and a couple of dashes of hot sauce. Add the eggs to the skillet with the melted butter and cook, while stirring, until desired doneness.

To serve, assemble the Canadian bacon on top of the toasted whole grain waffles, top with the spinach, followed by the eggs, sliced tomato and the cheese. Transfer to the broiler to melt the cheese, a couple of minutes, then serve.


The Verdict: David really like scrambled eggs and waffles so he really liked this dinner. I am not sure he cared much for the spinach but he at least tried it!


I make this as a dinner because generally I am too lazy in the morning, and if I want a fancy breakfast I prefer to go to Jac's and order their delicious french toast! I am the kind of person who loves to have breakfast for dinner. I also like it because it's quick and I generally have all the ingredients on hand. Tonight we substituted the canadian bacon for regular bacon and we used swiss cheese. I prefer the gruyère but it's much more expensive so we generally don't use it.

Monday, March 1, 2010

Pasta Carbonara

It is no secret that I am a HUGE fan of the Pioneer Woman. I have her cook book and swear by her website for recipes. Back a few months ago I tried out this recipe for Pasta Carbonara. It's from her friend Pastor Ryan, a contributor to her blog. We liked it but my execution needed some work so I wanted to try it out again and wouldn't you know, second time is a charm!

Ingredients:
1 pound Bacon Or Pancetta
1 pound Linguine Pasta
1 whole Large Onion
8 cloves (to 12 Cloves) Garlic
1 cup White Wine (or Substitute Another Cup Of Stock)
1 cup Chicken Stock
4 whole Eggs
1-½ cup Parmesan Cheese
1 bunch Parsley
½ sticks Butter
1 Tablespoon (to 2 Tablespoons) Black Pepper

The How To:
First, slice up 1 pound of bacon into pieces about one inch wide. Once they’re sliced, just toss your bacon pieces into a stainless steel pan. Cook until browned and crisp.


While the bacon’s cooking, set a pot of salted water (I use about 2 tablespoon of salt for a gallon of water) on the stove for our pasta. When it comes to a boil add your linguine and cook until al dente, tender-firm.

Next, chop your onion. When the bacon is cooked, scoop it out with a slotted spoon and set it onto a plate. Reserve the bacon grease! We still need that stuff. Throw the diced onions into the bacon grease. Give the onions a quick stir and let them cook down over a medium-high heat for a couple of minutes.


In the meantime, thinly slice the garlic. After the onions have cooked for a couple of minutes, throw in the garlic. Adding it after the onions have cooked a little will prevent the garlic from burning. After the onion and garlic have cooked for another couple of minutes, remove from the pan with a slotted spoon. Discard the grease.

Place the pan back on high heat until it starts to smoke a little. As soon as the pan begins to smoke, pour in the white wine (or chicken stock). Whisk until pan is thoroughly deglazed and all of the brown bits have come off of the bottom of the pan. Add 1 cup of chicken stock. Return bacon, onion and garlic back to the pan. Let simmer over medium heat.

Crack four eggs into a large bowl. Add most of the Parmesan cheese, and rough chop the parsley, adding it into the eggs as well. Leave a little Parmesan and parsley out for a garnish.


Mix well with a fork.


Drain the water from your pasta. Be sure the pasta is very hot. Add the pasta to the egg mixture and then add the bacon/onion mixture. Finally throw a ½ stick (1/4 cup) of butter in there. Mix it all together well. Pepper to taste. Garnish with parmesan and parsley.


The Verdict:
Like I said above, the second time is a charm. I worked out the kinks the first time I made it and all I can say is YUM! It was good the first time but this time it was DELICIOUS! According to the Doc this one is a winner, which is pretty much the best compliment I could get from him! I would highly recommend this dish.

I served it with a salad and some crusty Italian bread. I also didn't have linguine on hand so I used bucatini instead. The key is to under cook the pasta just slightly before al dente!


For better pictures and a step by step process, click on the hyperlink above!

Thursday, February 25, 2010

German Chocolate Cake


There is nothing German about German chocolate cake, did you know that? It is a Texas creation from the late 1950's of chocolate, coconut, and toasted pecans. How can you go wrong with that flavor combo???? It is also easy to make. Observe...
Step 1: Bake yourself 2 9 inch round chocolate cakes using whatever recipe you'd like (I'm not gonna lie, a box of Duncan Hines devil's food mix is fine, although I do substitute the water for coffee...it helps bring out the chocolate flavor. Cool them completely.
Step 2: Toast up about 2 cups of chopped pecans and 2 cups of shredded coconut in the over for about 10-15 minutes.
Step 3: To prepare your icing, bring 3/4 cup of evaporated milk, 1/2 cup light brown sugar, a dn 1/2 cup of butter to a boil. Stir at medium low heat for about 15 minutes, until the mixture thickens. Remove from the heat and add your cocnut and pecans, and set aside to cool.
Step 4: Cut the tops off your cake rounds. Place the 1st round on a cake platter and top with half of the coconut icing. PLace the second round on top and put the rest of the cocnut mixture on top.
Step 5: To finish it off, frost the sides of the cake with a chocolate frosting (yep, I cheat and buy the store-bought stuff but I'll bet home-made tastes better).